If you’re dealing with moisture or water problems in your crawl space, installing a sump pump is one of the most effective solutions. This guide will walk you through how to install a sump pump in a crawl space, to manage ground water and take the first step necessary to protect the structure under your home.
Why Install a Sump Pump in a Crawl Space?
Crawl spaces are often prone to moisture accumulation, which can lead to mold growth, structural damage, and even health issues. A sump pump for crawl spaces is designed to collect and remove water, preventing these problems and keeping your home safe and dry.
Tools and Materials You’ll Need
Before starting the crawl space sump pump installation, gather the following tools and materials:
- Sump pump kit (including the pump, basin, and cover)
- PVC piping
- Gravel
- Shovel
- Drill with a hole saw attachment
- Pipe wrench
- Level
- Caulking gun and silicone sealant
- PVC glue and primer
- Check valve
- Utility knife
- Teflon tape
What Happens If You Skip a Sump Pump in Your Crawl Space Under the House?
Many homeowners delay or avoid installing a sump system, thinking it’s not urgent. But here’s the reality: skipping a sump pump in crawl space under house areas comes with long-term risks.
Without a sump pump:
- Groundwater will accumulate under your home
- Humidity levels rise, encouraging mold and mildew
- Wooden structural elements may rot or weaken
- Pest infestations are more likely due to damp conditions
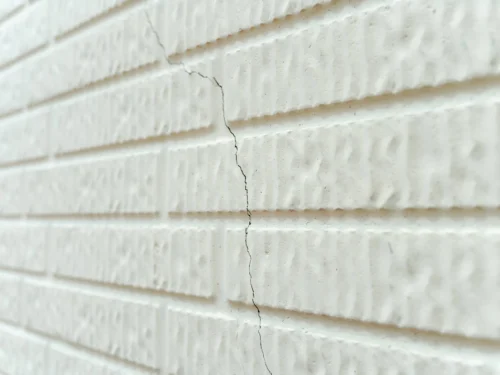
- Foundation cracks and settlement can occur over time
Simply put, if you don’t have a plan for installing a sump pump in crawl space zones, you’re gambling with your home’s health. Prevention is always cheaper than structural repairs — especially when water is involved.
How Does a Sump Pump Work in a Crawl Space Environment?
A common question homeowners ask is: how does a sump pump work in a crawl space when it’s installed under a house?
Here’s how it works:
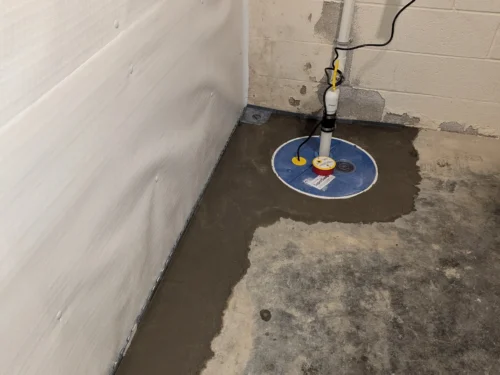
A sump pump is installed in a basin dug at the lowest point of your crawl space. As groundwater collects in the soil or through perimeter drainage, it flows into the basin. Once the water reaches a certain level, a float switch triggers the pump to activate. The water is then pumped through a discharge pipe to the exterior of the home — away from your foundation.
The pump works automatically. During storms or seasonal water buildup, it prevents water from accumulating under the house. Over time, this helps control humidity, reduce mold risk, and protect structural components like wood beams and piers.
The efficiency of a sump pump in crawl space under a house relies on correct placement, reliable drainage routing, and a well-sealed discharge system.
Step-by-Step Guide on How to Install a Sump Pump in a Crawl Space
1. Choose the Right Location
The first step in crawl space sump pump installation is choosing the best location for your sump pump. The ideal spot is the lowest point in the crawl space, where water naturally accumulates. Ensure the area is accessible for maintenance and near a power source for the pump.
2. Dig the Sump Pit
Once you’ve selected the location, use a shovel to dig a hole large enough to accommodate the sump basin. The hole should be deep enough to flush the basin’s top edge with the crawl space floor. After digging, place the sump basin into the hole and ensure it’s level.
3. Prepare the Basin
Before installing the sump pump, drill holes around the bottom sides of the sump basin. These holes will allow water from the surrounding soil to enter the basin. Place a layer of gravel at the bottom of the pit to improve drainage and prevent the sump pump from sitting directly on the soil, which can reduce its lifespan.
4. Install the Sump Pump
Carefully place the sump pump into the basin, ensuring it is upright and level. Connect the pump to the discharge pipe using PVC piping. The pipe will carry water from the pump to the outside of your home. Use PVC glue and primer to secure the connections, ensuring no leaks.
5. Attach the Check Valve
A check valve prevents water from flowing back into the sump basin after the pump has shut off. Attach the check valve to the discharge pipe using a pipe wrench and Teflon tape. The arrow on the valve should point away from the pump, indicating the direction of water flow.
6. Run the Discharge Pipe
Next, you’ll need to run the discharge pipe from the check valve to the exterior of your home. Using a hole saw attachment, drill a hole in the crawl space wall. Ensure the hole is slightly larger than the pipe’s diameter for easy installation. Feed the pipe through the hole, then seal around it with silicone caulk to prevent air and water leaks.
7. Test the Sump Pump
With everything in place, it’s time to test your crawl space sump pump. Plug in the pump and pour water into the basin to simulate a water accumulation event. The pump should activate and expel the water through the discharge pipe. Check for any leaks or issues with the discharge system.
8. Cover the Basin
Finally, place the cover on the sump basin. The cover helps to prevent debris from entering the basin and reduces moisture and odors in the crawl space. Secure the cover with screws or bolts, depending on the basin design.
Additional Considerations for Crawl Space Sump Pumps
When installing a sump pump in your crawl space, pairing it with a proper drainage system is crucial. Without directing groundwater toward the sump pump, the pump’s effectiveness may be limited. Installing perimeter drains ensures water collects in the basin and is effectively removed from the crawl space.
Another factor to consider is choosing the right pump capacity. For crawl spaces prone to heavy water accumulation, a higher-capacity pump may be necessary to handle increased volumes of water. Discussing your specific needs with a professional can help you select the right equipment for long-term success.
Many homeowners also install backup power solutions for their crawlspace sump pumps. This ensures continuous operation during power outages, a common time for water accumulation due to heavy storms. Options include battery backups or generators tailored for sump pump use.
Where to Position a Sump Pump in Crawl Space Under House Foundations
Location is everything when installing a sump pump in a crawl space. The pump needs to be placed at the lowest elevation point within the crawl space — typically where water pools after rain or snowmelt.
Why does this matter?
Because gravity will naturally guide water to that low point. Placing the sump basin here ensures the pump collects the maximum amount of water without depending solely on drain pipes.
Also consider:
- Proximity to a reliable power outlet
- Ease of access for maintenance
- Room to connect a discharge line and check valve
When planning how to install a sump pump in a crawl space, mapping out drainage flow and identifying the natural low spot is step one. This sets the foundation for a reliable water management system that protects your home’s structure from the ground up.
Maintenance Tips
Regular maintenance is key to ensuring your sump pump for crawl space continues to function correctly. Here are a few tips:
- Check the pump regularly: Inspect the sump pump every few months to ensure it’s working correctly. Test it by pouring water into the basin and watching the pump activate.
- Clean the basin: Remove any debris that may have accumulated in the basin to prevent clogs and ensure the pump operates efficiently.
- Inspect the discharge line: Ensure the discharge pipe is clear of obstructions and that water flows freely away from your home.
Avoid These Mistakes When Installing a Sump Pump in a Crawl Space
There are several common errors homeowners make when installing a sump pump in crawl space areas. These mistakes may seem small at first — but they can lead to serious water damage, pump failure, or structural issues.
Here’s what to watch out for:
- Wrong location: Placing the sump basin in a dry area instead of the low point renders the pump useless.
- Skipping the check valve: This leads to water flowing back into the basin after each pump cycle.
- Improper sealing: Gaps where the discharge pipe exits the crawl space can allow water and air to leak inside.
- Undersized pump: Using a pump that’s too weak for your water volume can overwhelm the system quickly.
- No backup system: Storms that bring water often knock out power — leaving your crawl space vulnerable when the pump shuts off.
Avoiding these mistakes is essential whether you hire a contractor or go the DIY crawl space sump pump route. A small oversight can mean major repair costs later.
Benefits of a Properly Installed Crawl Space Sump Pump
Installing a sump pump in your crawl space offers numerous benefits, including:
- Preventing mold and mildew: Keeping the area dry reduces the risk of mold growth, which can cause health issues and damage your home’s structure.
- Protecting your foundation: Water accumulation can lead to foundation cracks and other structural problems. A sump pump helps to divert water away, protecting your home’s integrity.
- Increasing home value: A dry and well-maintained crawl space can improve your home’s market value, making it more attractive to potential buyers.
Why Professional Installation Matters
While learning how to install a sump pump into a crawl space may seem straightforward, professional installation ensures long-lasting and reliable results. Experts not only handle the technical aspects but also assess your crawl space for additional issues such as improper grading or excessive moisture. Professionals also provide warranties and support, giving you peace of mind.
For those considering DIY installation of sump pumps in crawl space, it’s critical to plan thoroughly. Pay special attention to the slope of the discharge line and ensure proper sealing around the pipe entry points. Mistakes in these areas while installing a sump pump in a crawl space can lead to inefficiencies and potential flooding.
Final Words From VFS
Learning how to install a sump pump in a crawl space can sound manageable on paper, but it is a detail-oriented project requiring a lot of hard work. Proper installation is essential to keeping the ground water under your home managed. Without addressing ground water first, one cannot achieve a space free of humidity and moisture in the air.
Keep in mind that if this project is something you tackle, the aforementioned maintenance of the pump is critical to maintain water management. Also, without a full-perimeter drainage system installed to direct the ground water to the sump pump, the pump even if installed correctly may not be able to do it’s job since it’s only in one area within the crawlspace. While DIY projects are great for many, consider hiring the professionals to tackle this beast of a project to keep the crawlspace dry and prevent costly structural issues from arising in your crawlspace.
For more information about crawl space sump pump installation or to explore professional services, visit our crawl space sump pump page.

